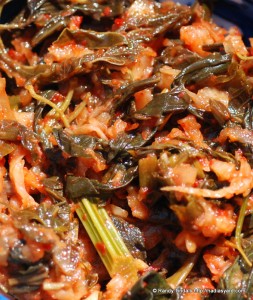
If I say so myself, it’s delicious! It’s got a nice crunchy/chewy texture, great flavor and relatively gentle heat. Next time I might add a little water to add more juice to the final product—this version is drier that the ones I’ve bought. The nice thing about making your own kimchi is the control you have over things like spiciness and chunkiness. I like spicy foods, but not if they take the top of my head off, so I was a little leery of adding a 1/2 cup of chili powder at first. I discovered, however, that the real Korean chili powder (purchased at Chong’s Market in Columbia) adds nice flavor and color, but just a pleasant, glowing heat that lingers a while, but never really bites. Nadia’s not as much a fan of picante foods as I am, but she loves this stuff. If you’re really sensitive to spice in foods, use less, but in that case I doubt you would ever eat kimchi anyway.
I would imagine that lots of native edibles would be tasty in kimchi, such as goldenglow, cup plant greens, young mildweed pods, or stinging nettles (might want to blanch these first a little to neutralize the sting). Experiment! Forage! If you come up with something great and would be willing to share, send it to me and we’ll post your recipe. In the meantime, here’s how to make ours:
What You Need
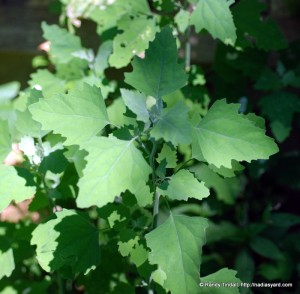
Several cups of washed wild greens. If you like more protein, skip the washing step..
1 head of garlic, peeled and finely minced (we got ours from local farmer, musician and all-around iconoclast, Paul Weber).
1 2-inch piece of fresh ginger, peeled and minced
1/4 cup fish sauce (available at oriental groceries)
1/3 cup chili paste or 1/2 cup Korean chili powder
1 bunch green onions, cut into 1-inch lengths (use the dark green part, too, except for the tough ends)
1 medium Asian radish (daikon), peeled and grated
1 teaspoon sugar or honey
How You Do It
1. If you want a finer kimchi, lightly chop greens into smaller pieces, or leave whole if you want a chunkier mix.
2. Mix the other ingredients in a very large metal or glass bowl.
3. Now combine everything and mix thoroughly. You might want to wear rubber gloves if mixing with your hands, to avoid chili burn and being dyed red.
4. Pack the kimchi in a clean glass jar large enough to hold it all and cover it tightly. Let stand for one to two days in a cool place, around room temperature.
5. Check the kimchi after 1-2 days. If it’s bubbling a bit, it’s ready and should be refrigerated. If not, let it stand another day. You should be able to eat it by itself for three weeks or so, and if it gets too fermented after that, it can be used in cooking things like Korean vegetable pancakes, stir-fried rice, or soups.


I got to your site by way of Pascal Bauder’s book. The fermentation world rocks!